Personal Safe Room

We’ve been saved several times from the Gulf Coast (specifically Houston/Galveston/Beaumont coast) hurricanes. Several have come very close to us, and we’ve lost many (up to 60 one time) large trees on our property. The trees in the area seem to be a barrier to high winds (goes over the tops), but we’ve been steadily losing them for various reasons.

It makes us think about moving. :worried:

And it makes us think about a personal safe room. A dome. A small dome. A dome that is useful for the 99.9% of the time when there isn’t the threat of hurricane-force winds.

Here’s a dome-in-the-wild near Brenham Texas that they used to create an apartment complex (Brenham is a college town.) This 20 foot diameter dome would make a good personal safe room, too. I’m sure five people could ride out a storm in one of those.


Monolithic Dome Studio Floor Plans

For a safe room application, there would have to be many considerations about protecting the entrance and windows against flying debris. There would also have to be a separated “safe room” for a generator and water, etc.

Venting and air exchange becomes important in such a small space.

Lots of floor space is more important than closet area, but there is the consideration of food storage, too.

There must be a thousand things to think about to make a long term event more comfortable. We (4 of us) stayed in a small motor home for over 10 days after a storm. Gasoline for the generator was the most important problem we had.

EDIT 20-JUL-2025: One more most important problem to solve is sewage. Systems to handle this are very expensive and can take up a lot of real estate.

1 Like

Bathroom!

We’re wanting to build an earth-sheltered double partial torus - just waiting for an investment to pay off and we’ll be off and running! We plan to have a 20’ dome totally underdground and invisible to anyone nosing around - more of a vault than an actual safe room. Valuables, out of season clothes like winter coats, papers we don’t want to store in an office. Of course we could go in there in the event of a tornado, but because the main house will be more than 50% earth-sheltered I think we’ll be pretty safe there.

We’re even looking at building a large dome shelter for our horses!

When/if this gets done, photos will be forthcoming!

When adding a domed safe room to an existing home system, it is very likely that the location of the home’s sewage system is well located for the home and not for any additions. One of the ways to move the sewage from an added domed safe room is to macerate (grind up) and pump the stuff to the existing sewage system (e.g. tanks.) This method may not be the best for a full-time residence, but a safe room would generally be a limited use building.

Home-sized sewer macerating pumps are specialized pumps designed to handle wastewater and sewage from residential plumbing systems. They are particularly useful in situations where gravity drainage is not feasible, such as in basements or areas below the main sewer line. Here’s a breakdown of their key features and functions:

Key Features

  1. Maceration: These pumps have built-in blades that grind solid waste into a slurry, making it easier to pump through smaller pipes. This process helps prevent clogs and allows for the efficient movement of waste.

  2. Compact Design: Home-sized macerating pumps are typically compact, allowing them to fit in tight spaces, such as under sinks or in small utility rooms.

  3. Pumping Capacity: They can handle a variety of waste types, including human waste, toilet paper, and other organic materials. Most models can pump waste over long distances and up to a certain height, depending on the specifications.

  4. Installation Flexibility: These pumps can be installed in locations where traditional plumbing would be difficult or impossible, such as in basement bathrooms or laundry rooms.

  5. Quiet Operation: Many macerating pumps are designed to operate quietly, making them suitable for residential use without causing significant noise disturbances.

Applications

  • Basement Bathrooms: Ideal for adding a bathroom in a basement where gravity drainage is not possible.
  • Laundry Rooms: Can be used to pump wastewater from washing machines.
  • Kitchen Sinks: Useful for kitchen installations that require waste to be pumped away from the sink.

Considerations

When selecting a macerating pump, it’s important to consider factors such as the pump’s capacity, the distance it needs to pump waste, and the height it needs to lift the waste. Proper installation and maintenance are also crucial to ensure efficient operation and longevity.

Home-sized sewer macerating pumps are specialized pumps designed to handle wastewater and sewage from residential plumbing systems. Here are ten popular macerating pumps that are commonly available for residential use:

  1. Saniflo Sanicompact: A compact macerating toilet that combines a toilet and macerator in one unit, ideal for small spaces.

  2. Liberty Pumps 200 Series: Known for its durability and efficiency, this series includes various models suitable for residential applications.

  3. Zoeller M53: A reliable and powerful sewage pump that can handle solids and is often used in basement installations.

  4. Saniflo Saniflo 1: A versatile macerator that can be used with various fixtures, including sinks, showers, and toilets.

  5. Wayne CDU980E: A submersible sump pump that can also be used for light sewage applications, known for its reliability.

  6. Everbilt 1/2 HP Submersible Sewage Pump: A robust pump designed for residential sewage applications, capable of handling solids.

  7. SumpMarine SM10102: A portable and lightweight macerating pump suitable for various applications, including draining and sewage.

  8. Liberty Pumps 250 Series: Another popular series from Liberty, designed for residential sewage applications with a high pumping capacity.

  9. Saniflo Sanibest Pro: A heavy-duty macerator designed for commercial and residential use, capable of handling multiple fixtures.

  10. Flotec FP0S1300X: A sewage pump designed for residential use, known for its efficiency and ability to handle solids.

When considering a macerating pump, it’s essential to evaluate the specific needs of your home, including the type of waste, the distance it needs to be pumped, and the installation requirements.

The average purchase and installation prices for macerating pumps can vary based on the model, features, and local labor costs. Here’s a general breakdown of the costs associated with the listed macerating pumps:

Average Purchase Prices

  1. Saniflo Sanicompact: $800 - $1,200
  2. Liberty Pumps 200 Series: $400 - $600
  3. Zoeller M53: $300 - $500
  4. Saniflo Saniflo 1: $600 - $900
  5. Wayne CDU980E: $150 - $300
  6. Everbilt 1/2 HP Submersible Sewage Pump: $150 - $250
  7. SumpMarine SM10102: $100 - $200
  8. Liberty Pumps 250 Series: $500 - $700
  9. Saniflo Sanibest Pro: $1,000 - $1,500
  10. Flotec FP0S1300X: $150 - $250

Average Installation Costs

Installation costs can vary widely based on the complexity of the installation, local labor rates, and whether any additional plumbing work is required. On average, installation can range from:

  • Basic Installation: $200 - $500
  • Complex Installation: $500 - $1,200 (especially if new plumbing or electrical work is needed)

Total Estimated Costs

Combining the purchase and installation costs, the total estimated costs for each pump can range from approximately:

  • Low-End Models: $300 - $700 (including installation)
  • Mid-Range Models: $600 - $1,200 (including installation)
  • High-End Models: $1,200 - $2,700 (including installation)

These prices are averages and can vary based on location, specific model features, and contractor rates. It’s advisable to get quotes from local suppliers and contractors for more accurate estimates.

As always, do proper (and skeptical) research for your situation.
YMMV (Your Mileage May Vary!) :smiley:

Here’s a typical installation diagram of a side discharge compact simplex grinder system - designed for sewage applications and for use in installations where the burial of electrical lines and piping is preferred.

Here’s a revised design for an economical simplex grinder system using a 1 HP grinder pump, specifically tailored for a wet well capacity of less than 50 gallons. This system is designed to pump sewage to an existing aerobic septic system.

System Design Overview

Key Components

  1. Grinder Pump:

    • Type: Submersible grinder pump.
    • Power Rating: 1 HP (approximately 0.75 kW).
    • Voltage: 120 VAC.
    • Amperage: Designed to operate within a 15 amp circuit.
    • Features: Integrated cutting mechanism to shred solids, suitable for typical sewage materials.
  2. Control Panel:

    • Functionality: A compact control panel that includes:
      • Start/stop controls.
      • Overload protection.
      • Alarm indicators for high water levels.
    • Automation: Optional remote monitoring capabilities.
  3. Wet Well:

    • Design: A wet well with a capacity of approximately 30-50 gallons.
    • Dimensions: For example, a cylindrical wet well could be around 3 feet deep and 2 feet in diameter.
    • Access: Include an access hatch for maintenance and inspection.
  4. Discharge Piping:

    • Material: Schedule 40 PVC or HDPE piping.
    • Size: 2-inch diameter discharge pipe to accommodate the flow from the 1 HP pump.
    • Check Valve: Install a check valve in the discharge line to prevent backflow.
  5. Float Switches:

    • Level Control: Use two float switches:
      • High-Level Float: Activates the pump when the water level rises above a set point (e.g., 2 feet).
      • Low-Level Float: Deactivates the pump when the water level drops below a certain point (e.g., 1 foot).
  6. Electrical Components:

    • Circuit Breaker: A 15 amp circuit breaker to protect the pump and control panel.
    • Wiring: Use appropriate gauge wiring (typically 14 AWG) rated for the pump’s electrical load.

Example System Configuration

  • Grinder Pump:

    • Model: 1 HP submersible grinder pump (e.g., from brands like Zoeller, Liberty, or Myers).
    • Specifications:
      • Voltage: 120 VAC
      • Amperage: 10-15 amps (check specific model ratings).
      • Maximum flow rate: Approximately 30-50 GPM (gallons per minute) depending on head pressure.
  • Control Panel:

    • Compact control panel with:
      • Start/stop switch.
      • Alarm for high water level.
      • Overload protection relay.
  • Wet Well:

    • Capacity: 30-50 gallons.
    • Dimensions: Approximately 3 feet deep and 2 feet in diameter (adjust based on site conditions).
    • Material: Use a durable material like fiberglass or polyethylene for the wet well to resist corrosion.
  • Discharge Pipe:

    • Material: Schedule 40 PVC.
    • Diameter: 2 inches.
    • Length: As required to connect to the aerobic septic system.
    • Check Valve: Installed in the discharge line.
  • Float Switches:

    • Type: Mechanical or electronic float switches.
    • Placement: High-level float set to activate the pump at approximately 2 feet of water, low-level float set to deactivate at 1 foot.

Considerations for Installation

  • Electrical Supply: Ensure that the electrical supply is properly grounded and meets local codes.
  • Pump Location: Install the pump in the wet well at a depth that allows for adequate operation without running dry.
  • Maintenance Access: Design the system for easy access to the pump and control panel for routine maintenance.
  • Regulatory Compliance: Verify that the installation complies with local health and safety regulations regarding sewage handling.

Conclusion

This economical simplex grinder system, featuring a 1 HP grinder pump and a wet well capacity of less than 50 gallons, is designed for efficient sewage handling and pumping to an existing aerobic septic system. Proper installation and maintenance will ensure reliable performance and longevity of the system. Always consult with a professional engineer or plumbing specialist to tailor the system to specific site conditions and regulatory requirements.

Imagine the Basic Safe Room Features

What Size and Shape?

The basic 20 footer with a 3.5 foot stem wall.

Reasons for Features

Stem Wall - 3.5 feet moves the curvature of the dome upwards allowing a person to stand closer to the dome before the stoop starts, but is also a wall that only has one curvature. Every piece of furniture or appliance that I have will easily utilize a 3 foot stem wall, however as, (no doubt years ago) Monolithic has discovered, typical washer / dryer appliances are better suited to the 3.5 foot stem wall.

Height - 8 feet allows for a “ceiling” clearance of 9 feet above the floor for looks, perception of size and room for accessories (fans, lighting, etc.) The diameter at that level is still 14.5 feet which also adds to the perception of size. A physical ceiling (hanging or faux, but not load bearing) would remove some of the “this is a dome” perception and provide some addition sound/echo suppression.

Portion Above Level - 2 feet is available for a utility space for lighting and wiring.

Is One Big Enough?

Safe Room - If this structure is only a safe room, then there are reasons not to include space taking features such as washer / dryer. In this case, too, it would be important that there be a full bathroom and necessary storage for food, clothing and bedding. I think I would not have a built-in stove top, but rather space for a counter top infrared “burner.” The sink would include a RO (reverse osmosis) filtered water outlet hydration purposes (saving space used by bottled water.) Other things to reduce the complexity of staying in a safe room.

Residence and Safe Room - For extended stay every day living, the same safe room is appropriate with changes for additional space and storage. In this situation an additional 20 foot dome is worth mentioning. With an additional dome, items like washer/dryer, freezer and even extended pantry would be moved to there. The main dome bathroom could be reduced to a ½ bath with the second dome containing the full bathroom (or vice versa.) The two domes would be connected with a covered “tunnel” walkway. Also, what good is it to survive a great storm, but see your vehicle up a tree? An additional dome would be a great safe room for a vehicle, too. (It would even provide extra room for those surprise “non-dome” visitors at the peak of a storm!)

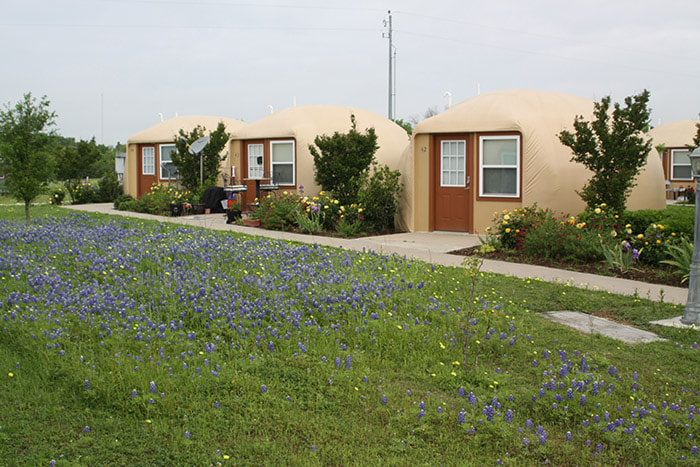
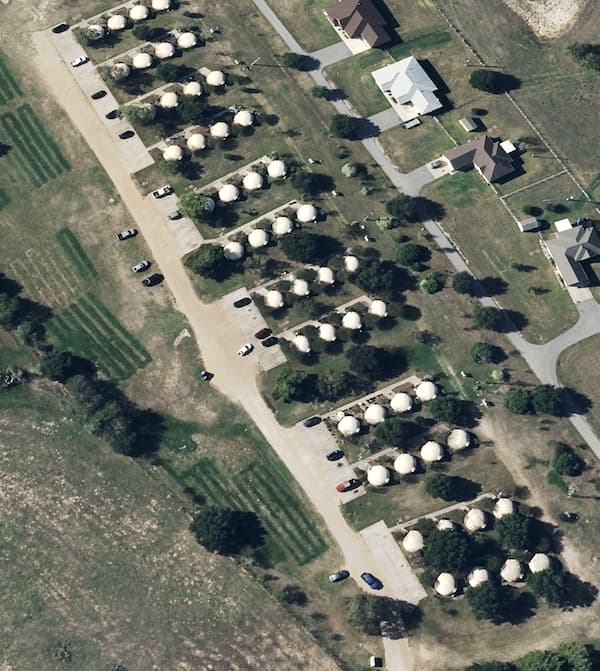
Imagine Different Safe Room Features

Ventilation Strategies for a Dome Home

Ventilating a dome home effectively is crucial for maintaining good air quality and managing humidity levels. Here are some strategies to consider for a dome home with a volume of 4500 cubic feet.

  • Passive Ventilation
  • Stack Ventilation
  • Exhaust Fans
  • Energy Recovery Ventilator (ERV)
  • Heat Recovery Ventilator (HRV)
  • Dehumidifiers
  • Air Purifiers
  • Houseplants
  • Regular Maintenance

Calculating Ventilation Needs:

To determine the specific ventilation requirements for a dome home of 4500 cubic feet, consider the following:

  • Air Changes per Hour (ACH): Aim for a minimum of 0.35 ACH for residential spaces. For a dome home, this translates to approximately 1,575 cubic feet of air exchanged per hour.
  • Ventilation Rate: Divide the total volume by the desired ACH to find the necessary airflow rate in cubic feet per minute (CFM). For example, to achieve 0.35 ACH:
    • CFM = (4500 cubic feet / 60 minutes X 0.35) = about 214 CFM
  • Special Ventilation Needs: Bathrooms and kitchens have additional random requirements for ventilation. The outdoor environment is important, too. You may not want to breath that air indoors. e.g. smoke from forest fires. Its important to remember that in a heavy rain type of storm, one may not be able to just open a window.

Emergency Water Storage Strategy

Creating a comprehensive water storage strategy for emergency weather events is crucial for ensuring access to safe drinking water and other essential uses. Here’s a detailed approach to effectively separate water usages for drinking and other purposes.

Drinking Water Storage

  1. Quantity:

    • Store at least 1 gallon per person per day for drinking and sanitation. For a family of four, this means a minimum of 4 gallons per day.
    • Aim for a two-week supply, totaling 56 gallons for a family of four.
  2. Containers:

    • Use food-grade plastic containers or glass bottles specifically designed for water storage.
    • Ensure containers are clean and sanitized before filling.
  3. Water Sources:

    • Fill containers with tap water, or consider using filtered water for better quality.
    • If using well water or other sources, ensure it is tested for contaminants.
  4. Storage Conditions:

    • Store in a cool, dark place to prevent algae growth and degradation of the container.
    • Rotate water supplies every 6 months to ensure freshness.
  5. Labeling:

    • Clearly label containers with the date of storage and intended use (drinking).

Non-Drinking Water Storage

  1. Quantity:
    • Store additional water for non-drinking purposes, such as bathing, cleaning, and flushing toilets. A general guideline is 2 gallons per person per day.
    • For a family of four, this would mean an additional 8 gallons per day, totaling 112 gallons for a two-week supply.
  2. Containers:
    • Use larger containers or barrels that are suitable for non-potable water.
    • Ensure these containers are also clean but do not need to be food-grade.
  3. Water Sources:
    • This water can come from rainwater collection, bathtub storage, or municipal water supplies.
  4. Storage Conditions:
    • Store in a separate area from drinking water to avoid contamination.
    • Keep covered to prevent debris and insects from entering.
  5. Labeling:
    • Clearly label these containers as non-potable to avoid confusion.

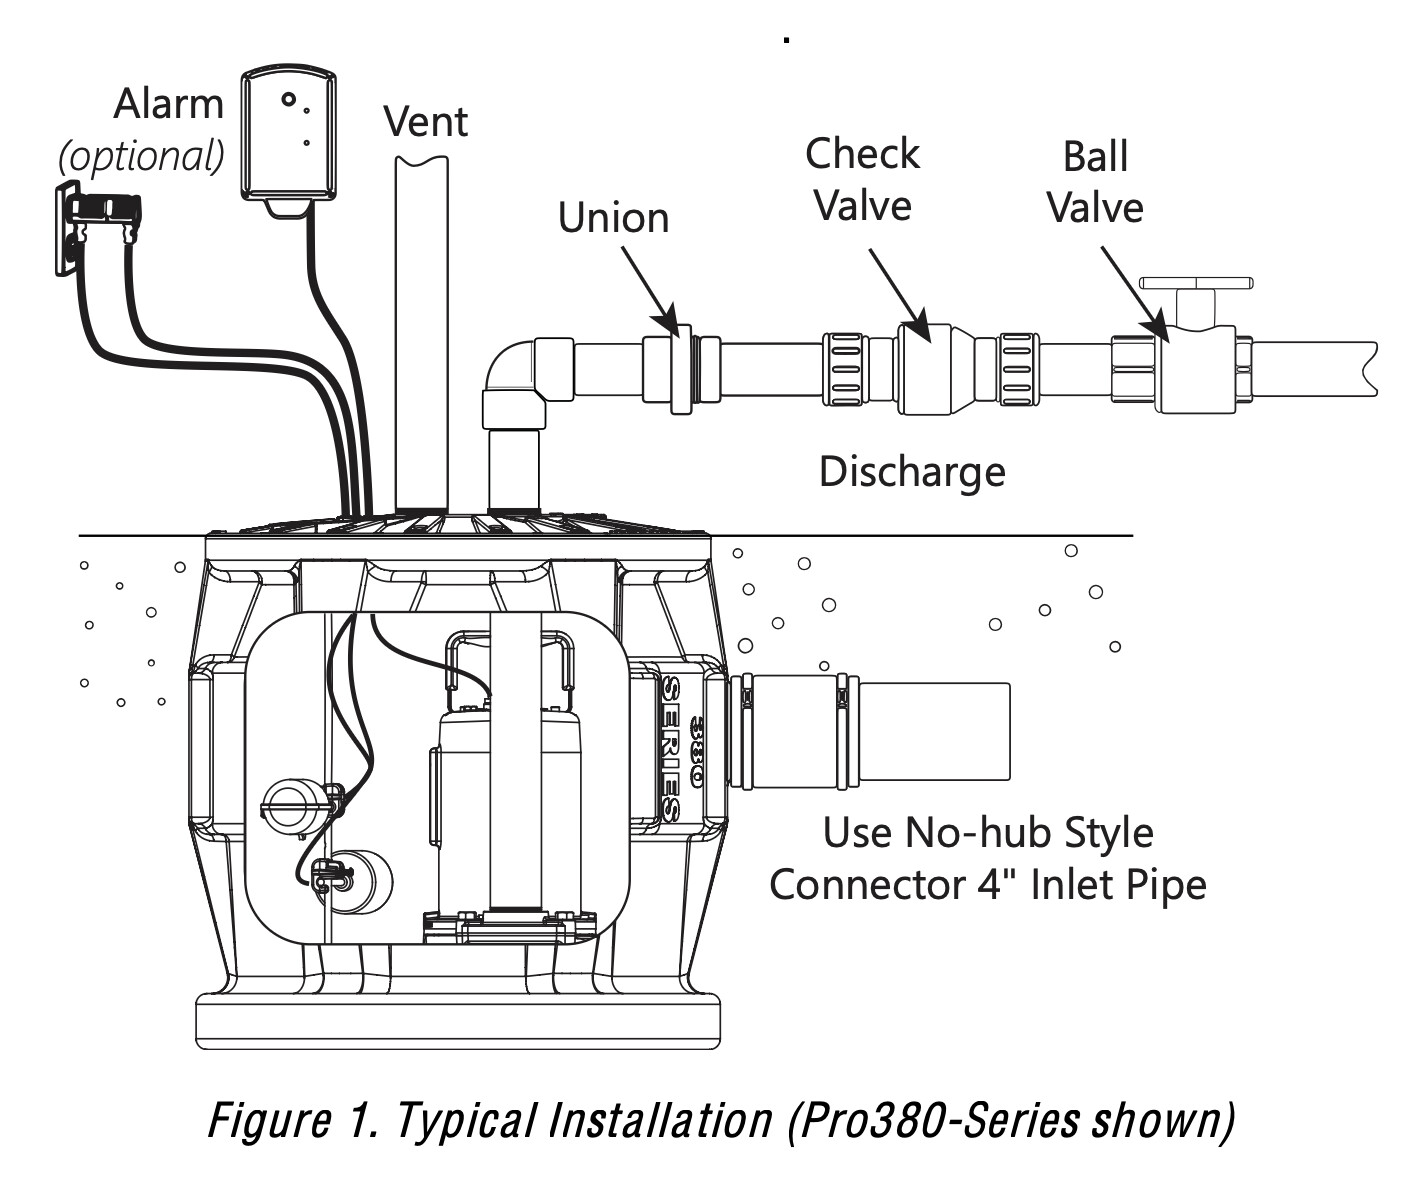
Here’s one way to keep stored water

Add a (or another) high capacity water tank to your normal water line. With proper plumbing and a solar / battery powered standby water pump, one may be able to have a normal water flow. The stored water will be constantly refreshed during one’s everyday water usage. RV (recreational vehicle) suppliers have equipment that would be useful.

Effectiveness of Tubular Skylights in a Dome Home

Tubular skylights can be an excellent choice for a 20-foot diameter dome home due to their unique design and functionality. Tubular skylights operate by bouncing captured sunlight through a highly reflective, mirror-like light pipe equivalent of up to 300 to 1,450 watts of incandescent lighting. Here’s a breakdown of how they would work in such a structure.

Benefits of Tubular Skylights

Benefit Description
Natural Light Tubular skylights can significantly increase natural light, making the space feel larger and more inviting.
Energy Efficiency They can reduce the need for artificial lighting during the day, leading to energy savings.
Versatility Their compact design allows for installation in various locations, even in curved surfaces like a dome.
Reduced Heat Gain Unlike traditional skylights, tubular skylights often have reflective tubing that minimizes heat gain.
Easy Installation They can be easier to install than larger skylights, especially in unique architectural designs.

Considerations for Dome Homes

  1. Placement: The effectiveness of tubular skylights depends on their placement. Ideally, they should be installed where they can capture the most sunlight, typically on the upper sections of the dome.
  2. Number of Skylights: Depending on the desired brightness, multiple tubular skylights may be needed. For a 20-foot dome, consider installing several units to evenly distribute light throughout the space.
  3. Size and Diameter: Tubular skylights come in various sizes. For a dome home, selecting a diameter that complements the space without overwhelming it is essential. Common sizes range from 10 to 14 inches in diameter.
  4. Climate Considerations: In areas with extreme weather, ensure that the skylights are well-insulated and sealed to prevent leaks and heat loss.
  5. Aesthetic Integration: The design of the tubular skylights should harmonize with the dome’s architecture. Consider options that blend well with the overall aesthetic.
  6. Artificial LED Accessory: Most tubular skylights have a feature to add simple LED lighting for use after sundown. This could be as simple as an internal socket for a “traditional” LED bulb. There is a DIY advantage, too.
  7. Made In USA: Natural Light Energy Systems.

In summary, tubular skylights can work very well in a 20-foot diameter dome home, enhancing natural light and energy efficiency while complementing the unique architectural style.

Powering a 20-Foot Dome Home Off-Grid

To effectively power a 20-foot dome home with a kitchen, tankless water heater, and a 20,000 BTU split air conditioning unit in a no-grid power situation, we need to analyze the energy requirements, battery storage, and solar panel capacity.

Energy Requirements

Let’s break down the energy consumption of the appliances:

Appliance Power (W) Daily Usage (hours) Daily Energy Consumption (Wh)
Kitchen (w/ appliances) 1,500 3 4,500
Tankless Water Heater 3,000 2 6,000
Split Air Conditioning 2,000 8 16,000
Total 26,500

Adjusted Energy Consumption

With a 75% reduction in power usage during no-grid power times, the adjusted daily energy consumption becomes:

  • Total Daily Energy Consumption: 26,500 Wh × 25% = 6,625 Wh (or 6.625 kWh)

Battery Storage Requirements

Using LiFePO4 batteries with a capacity of 280 Ah at 48 VDC, we can calculate the total energy storage:

  • Battery Capacity (Wh): 280 Ah × 48 V = 13,440 Wh (or 13.44 kWh)

Given that the daily energy requirement is 6.625 kWh, a single battery would be sufficient for one day of usage. However, to ensure reliability and account for inefficiencies, it’s advisable to have at least two batteries:

  • Total Battery Capacity: 2 × 13,440 Wh = 26,880 Wh (or 26.88 kWh)

Solar Panel Requirements

To recharge the batteries using solar energy, we need to determine the solar panel capacity required. Assuming an average of 5 peak sun hours per day:

  • Daily Solar Energy Requirement: 6,625 Wh (to cover daily usage)
  • Total Solar Panel Output Needed: 6,625 Wh / 5 hours = 1,325 W

To account for inefficiencies and ensure sufficient charging, it’s prudent to oversize the solar array. A 2 kW solar panel system would be a good target:

  • Total Solar Panel Capacity: 2,000 W

System Components Overview

Component Specification Cost
Inverter/Charger 48 VDC, 8 kW PV input, 6 kW output $1,600
Batteries w/BMS 280 Ah LiFePO4, 48 VDC, 2 units $6,600
Solar Panel option 2 kW, 440W, 5 units, w/rack mount $2,000
Generator option 2 kW, Honda EU2200i $1,000

Costs in 2025 using data from Current Connected, LLC and EG4 Electronics, LLC
Favorite Explainer: Will Prowse Off-Grid Solar Power

Conclusion

This setup will provide a reliable off-grid power solution for your dome home, ensuring that you can run your kitchen, tankless water heater, and air conditioning efficiently. The combination of products, including the inverter, batteries, and solar panels (or generator), will ensure high performance and safety.